How to Tag
When people search or browse the website (see How to Search), articles and posts appear as a result of tags and categories.
So for the website to function as well as possible, all posts and articles need to be tagged and have a category assigned to them.
So far, we have published a post called ‘The Ghost of Lady Stirrup’. It’s publicly available but will be easier to find if you do the following:
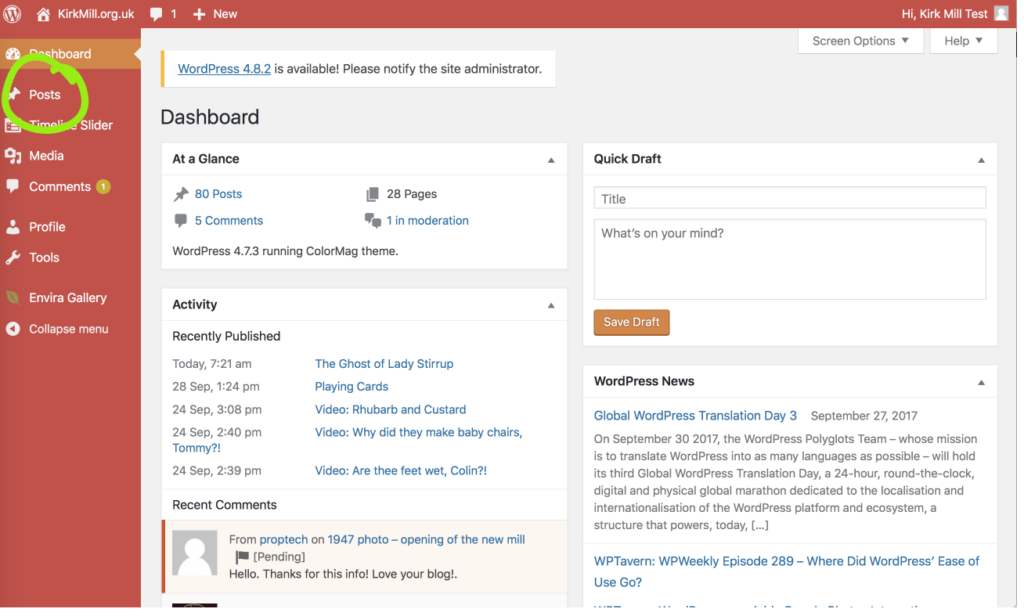
1. Log in. You are taken to the dashboard. Click on Posts:
2. When the posts window loads, you’ll see that it looks slightly different to the last time you went to this window. You can only see one post, and that is yours. This is because now that you have authored a post, your login directs you to a list of posts that has been filtered to show only the posts you have authored.
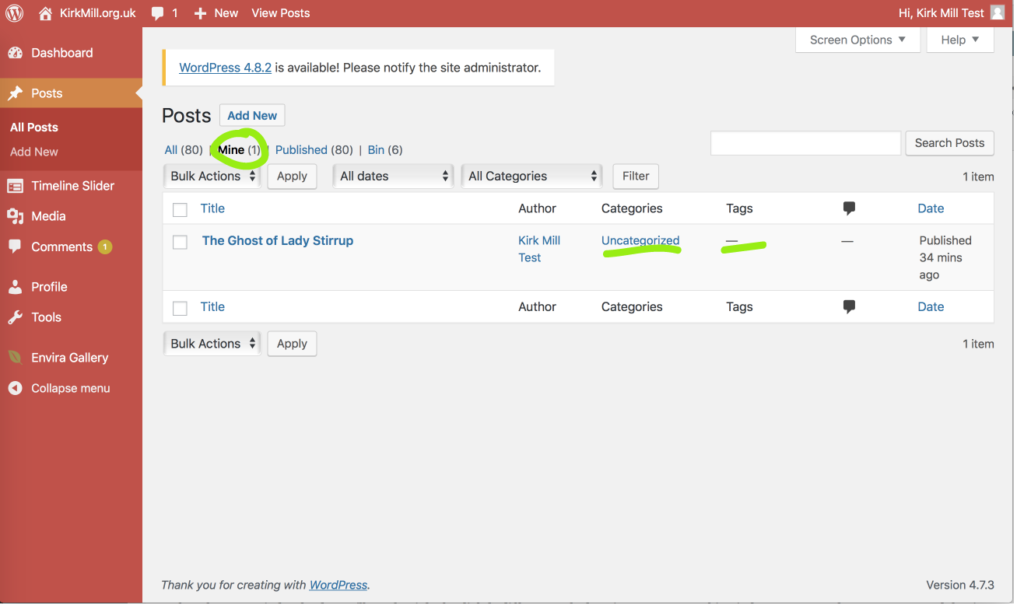
If you click on the ‘All‘ link just to the left of the ‘Mine‘ filter, a list of all the posts on the website will load. You might also notice that under the ‘Categories’ and ‘Tags’ columns, your article is currently tag-free and uncategorised. This is what we’re going to change now.
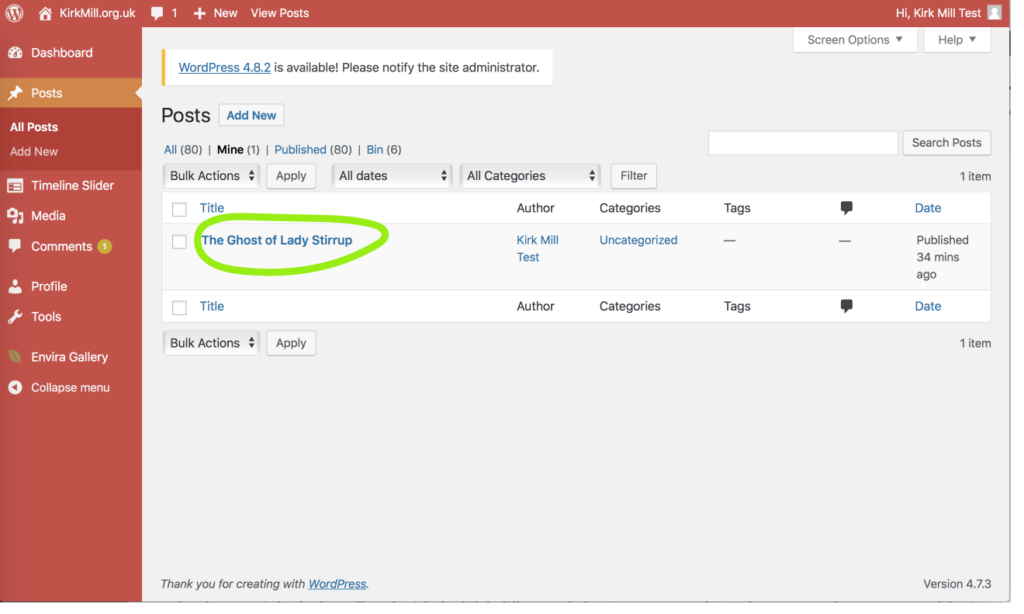
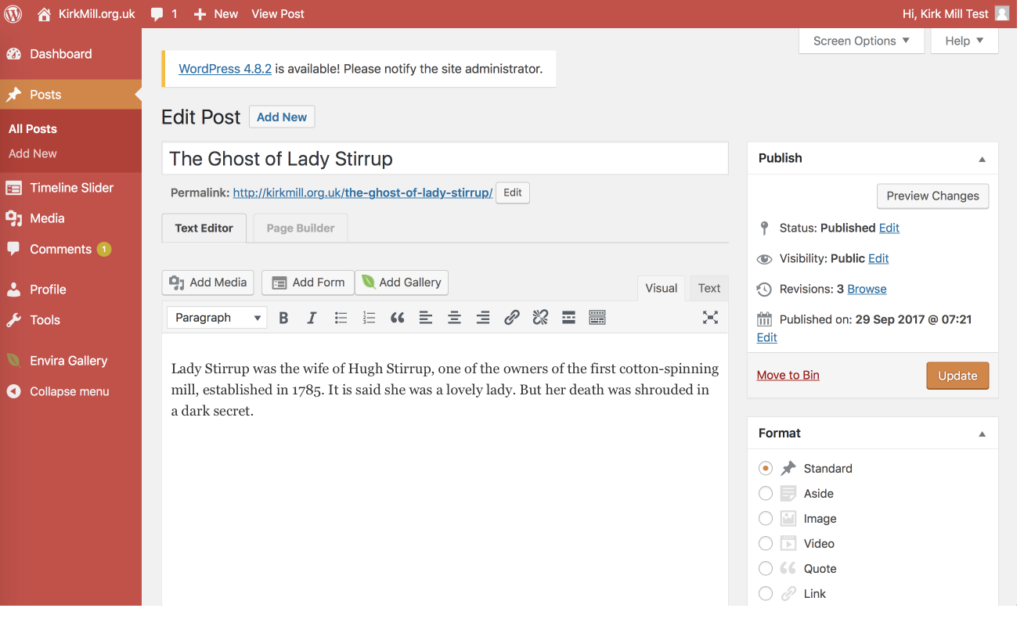
3. Open up your post by clicking on the blue text of your post title.
4. Your post will load and all should look pretty familiar.
5. Scroll down the page and you’ll see some small boxes on the right-hand side. This is where we’re going to make changes. We’re focusing on the ‘Categories‘ and ‘Tags‘ boxes
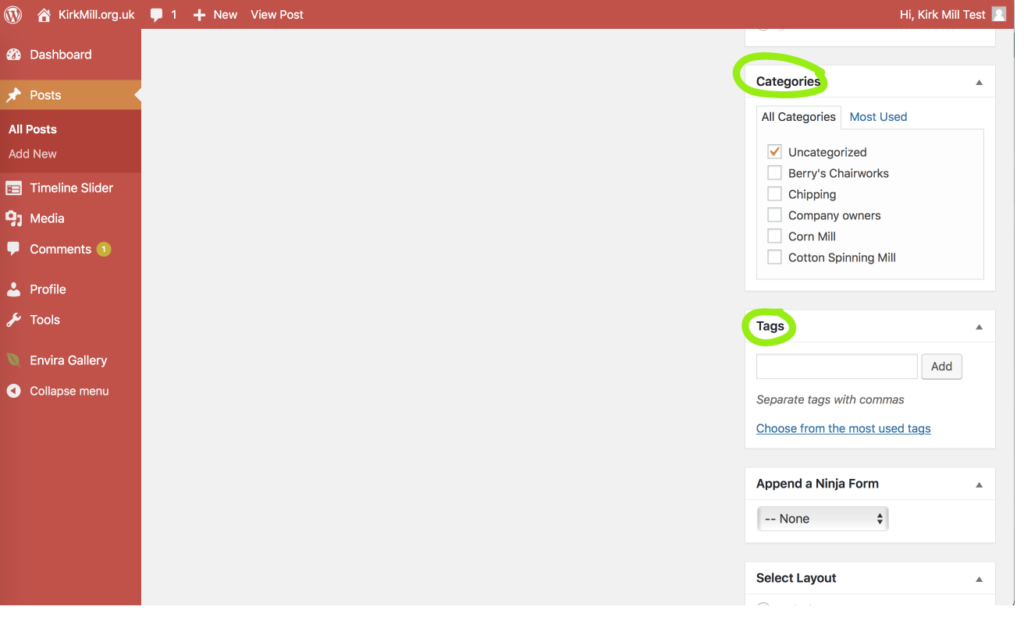 Categories
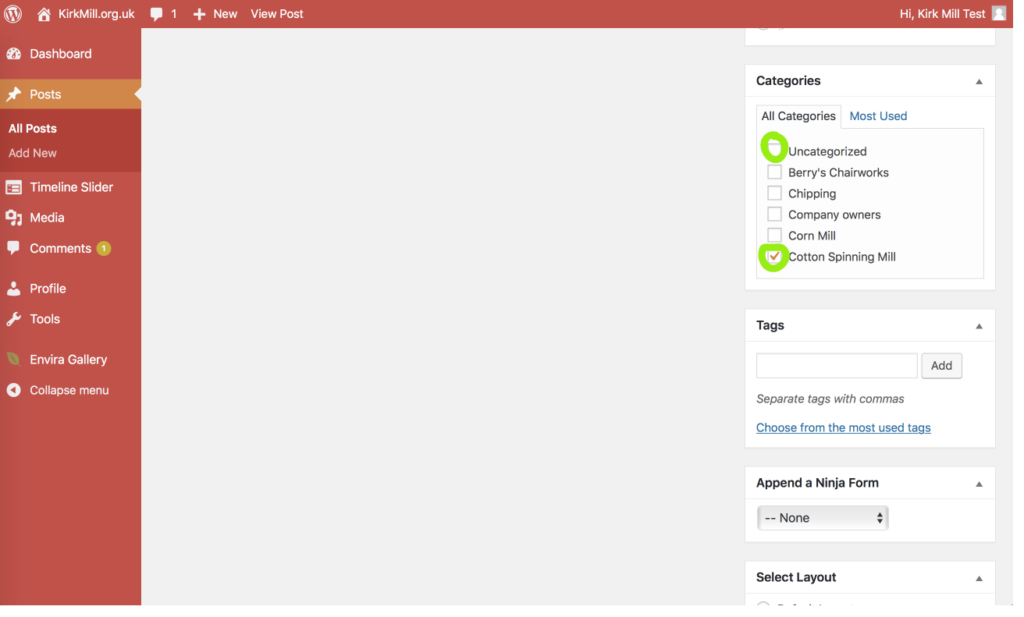
6. In the categories box, you’ll see that currently your post on Lady Stirrup is ‘Uncategorized‘. Simply click on the small box that says ‘Uncategorized’. The tick that is there will disappear. Now, since Lady Stirrup was the wife of a cotton-spinning mill owner, an article about her belongs in the ‘Cotton Spinning Mill‘ category. Click on this little box and a tick will appear.
 Tags
Tags
7. Now to add tags. You can tag your article with any word or phrase you think is appropriate. Type into the Tags box a keyword that is relevant to your article. I’m going to add these tags to my post: ‘Hugh Stirrup’, ‘Lady Stirrup’ and ‘Ghost’.
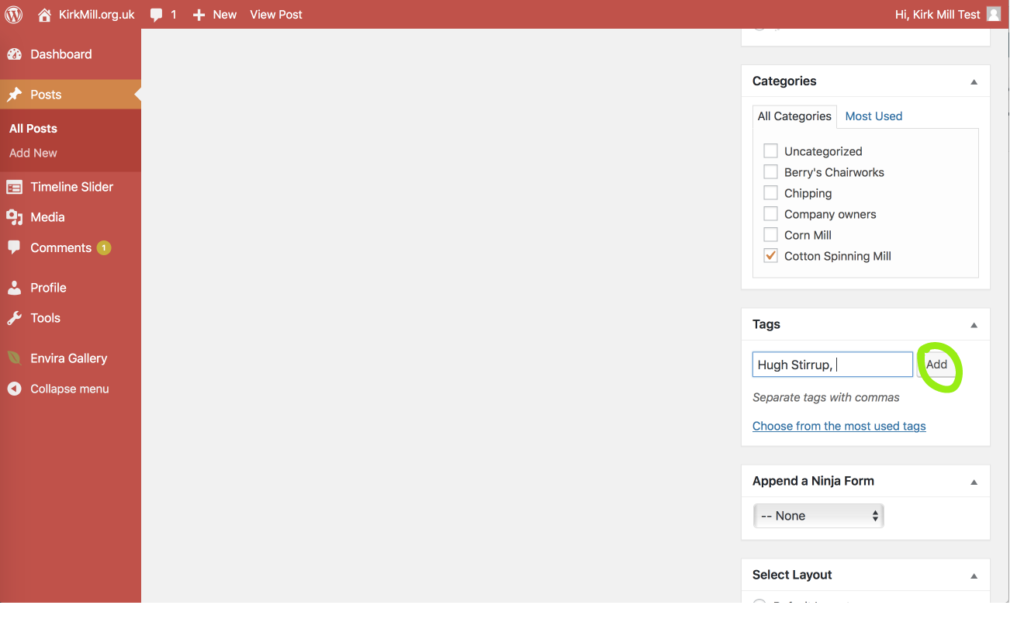
8. First, I’m going to add the tag ‘Hugh Stirrup’. As I type in Hugh Stirrup’s name, a little circle starts whirring round and a list appears below the tags box, containing two names: Hugh Stirrup and Hugh Cowper:
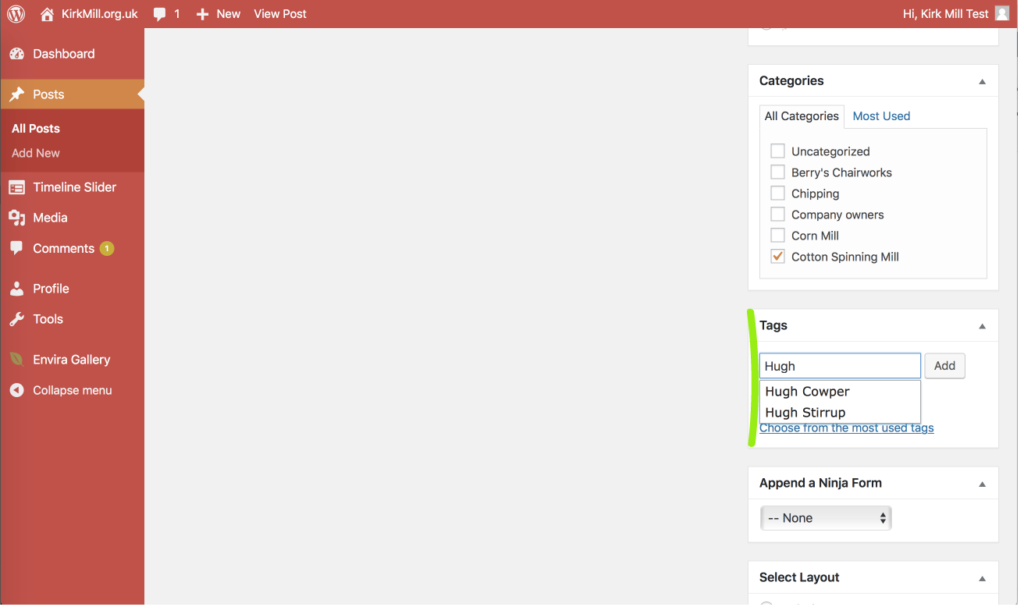
9. These tags have been used in other posts. If a list appears when you’re typing into ‘Tags’, then just select your keyword from that list. And click ‘Add’
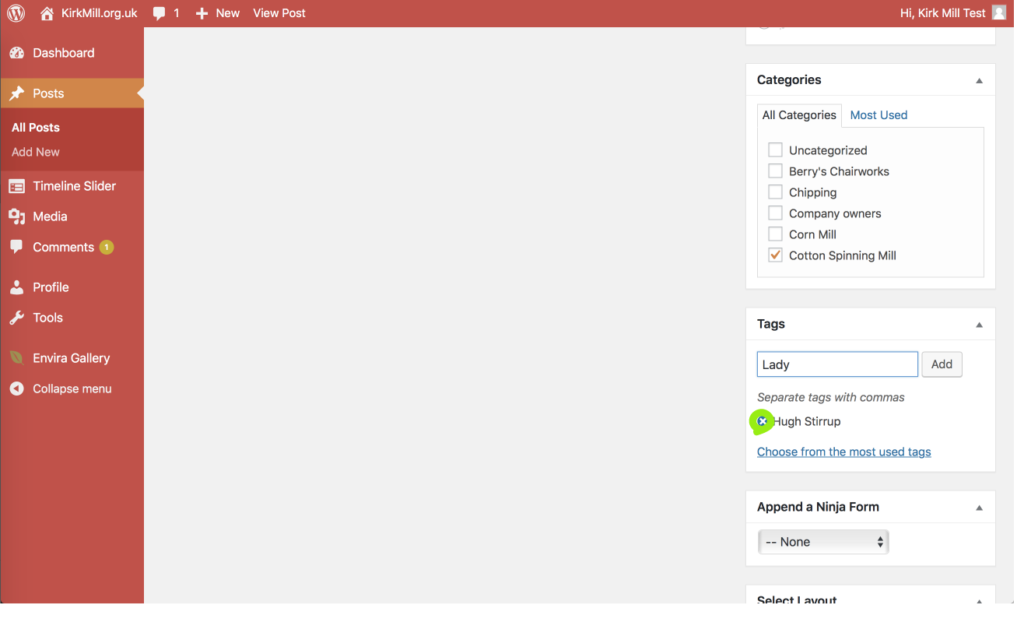
10. You’ll see that the keywords – in this case, ‘Hugh Stirrup’ – appear below the tags box. Your post is now tagged with the keyword ‘Hugh Stirrup’.
If, on reflection, you want to delete that tag, clicking on the little cross to the left of your keyword will remove it.
Now, I want to add the keyword: ‘Lady Stirrup’. In this case, no list of keywords appears. Clearly, then, ‘Lady Stirrup’ has not been used to tag any other posts. You’re adding a new tag.
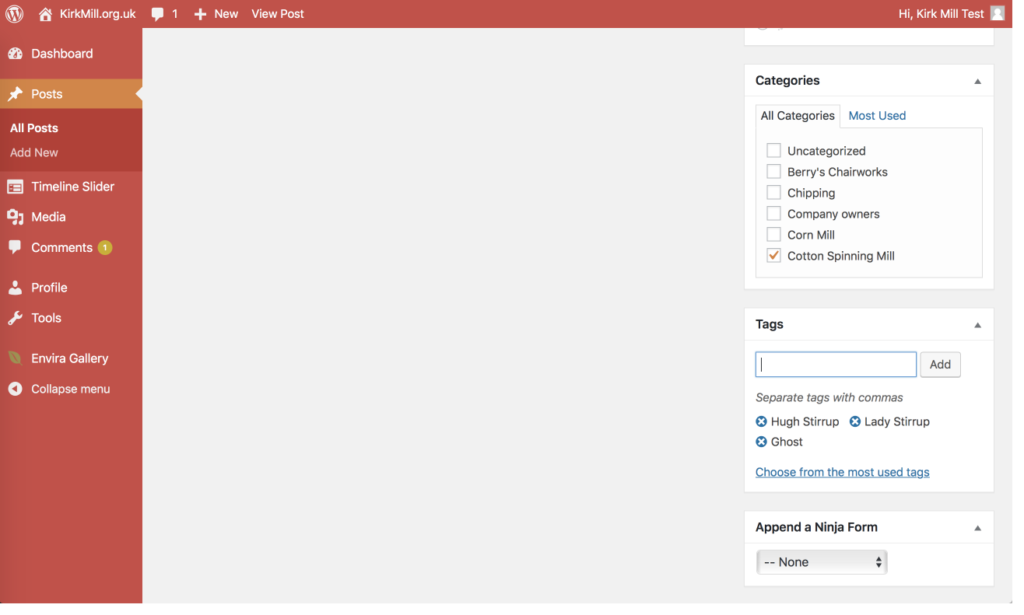
But you do the same thing as before – click ‘Add’ and your post will be tagged with this new tag.
I will go through the same motions with ‘Ghost’.
11. I have now changed category and added the tags I want to add. There’s one more thing to do …
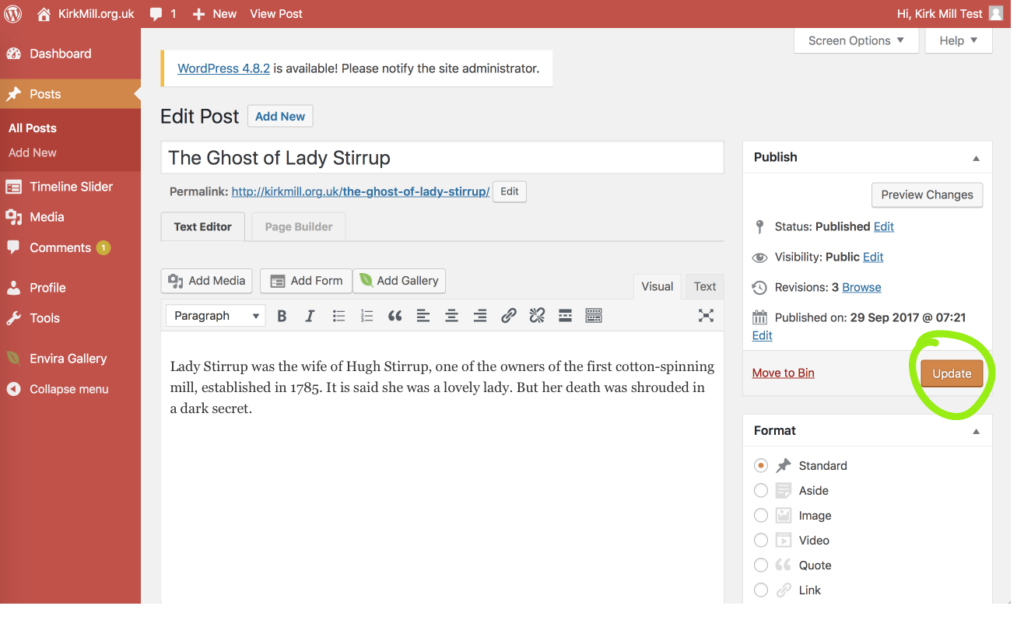
12. Save Changes !!!!! Scroll up to the top of the page and update. Now your post is tagged and categorised.
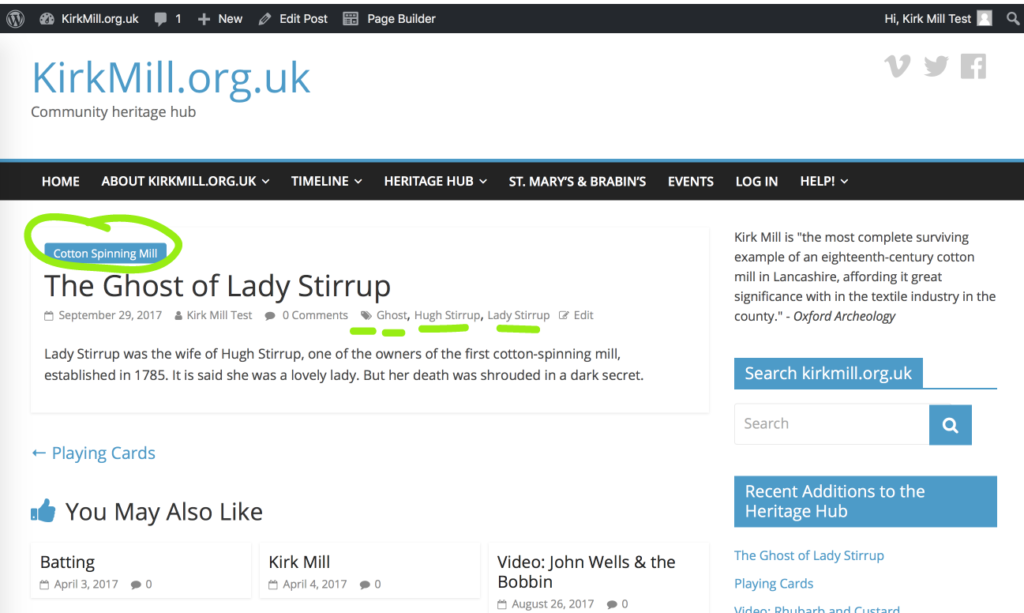
 13. Take a look at your handiwork: either go to kirkmill.org.uk or preview changes. You will see that now your article’s category in the blue box above the post title is ‘Cotton Spinning Mill’ and also, in small text below the title, there are the keywords you’ve recently added. Good job done!! Now people can easily search for and find your post. Now it’s time to add an image.