How to Post
Here are the steps involved in creating a Post. In this guide, we’ll cover:
– Generating a Post
– Publishing a Post
– Previewing a Post
– Editing a Post
Once you have created a post, it’s a good idea to move on to the guides on How to Tag; How to Add an Image; How to Create a Link
But for now, we’ll create the basic article you want to write.
Generating a Post
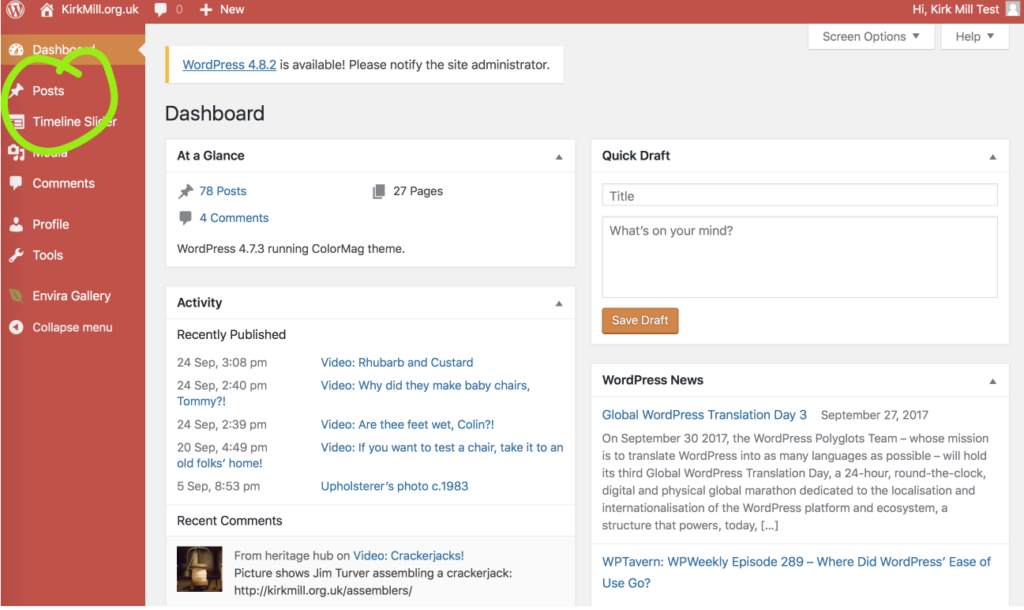
1. Log in (or Sign Up). If you are returning to the log in area, you will be directed immediately to your dashboard (if you are logging in for the first time, you will be directed to your profile page. It’s worth checking the Now you’re Logged In guide just to familiarise yourself with what you’re seeing). Click on ‘Posts‘ in the menu on the left-hand side:
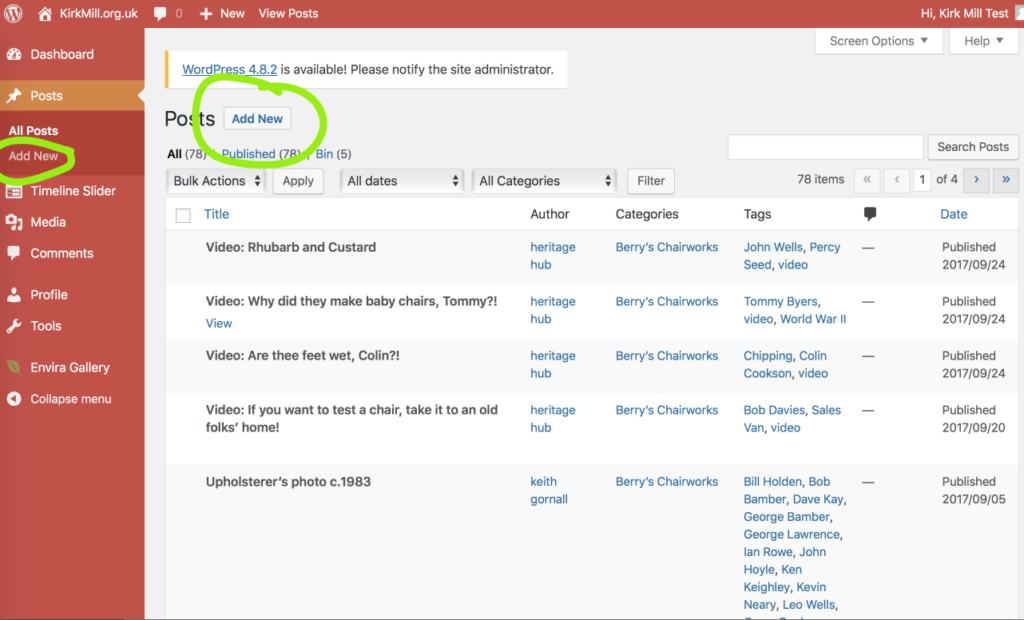
2. The posts window will open up and you will see the latest posts that have been published. Click on ‘Add New‘. You can do that either at the top of the window or from the left-hand side menu:
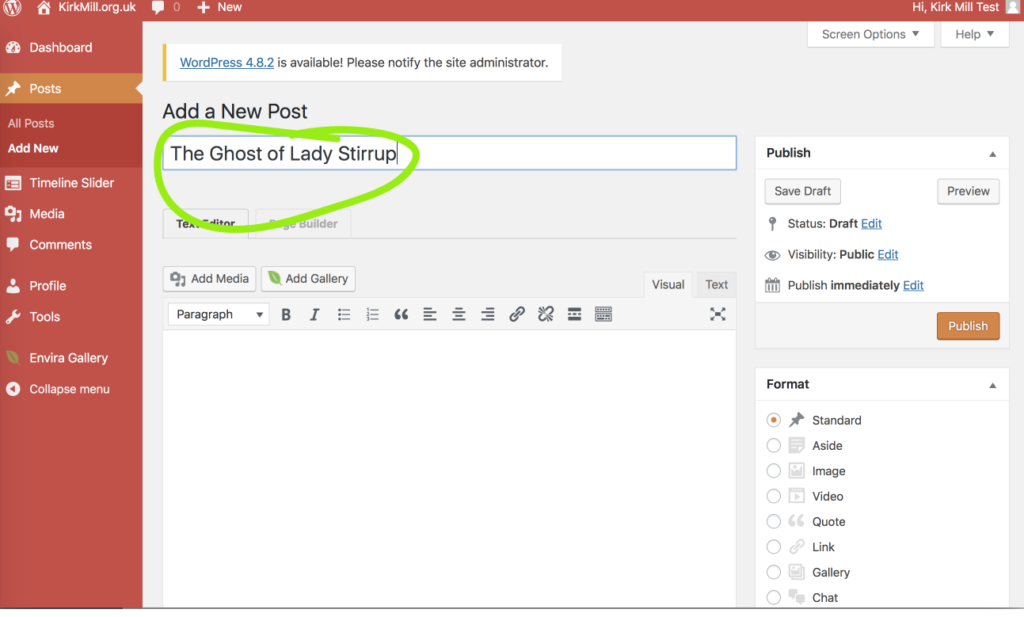
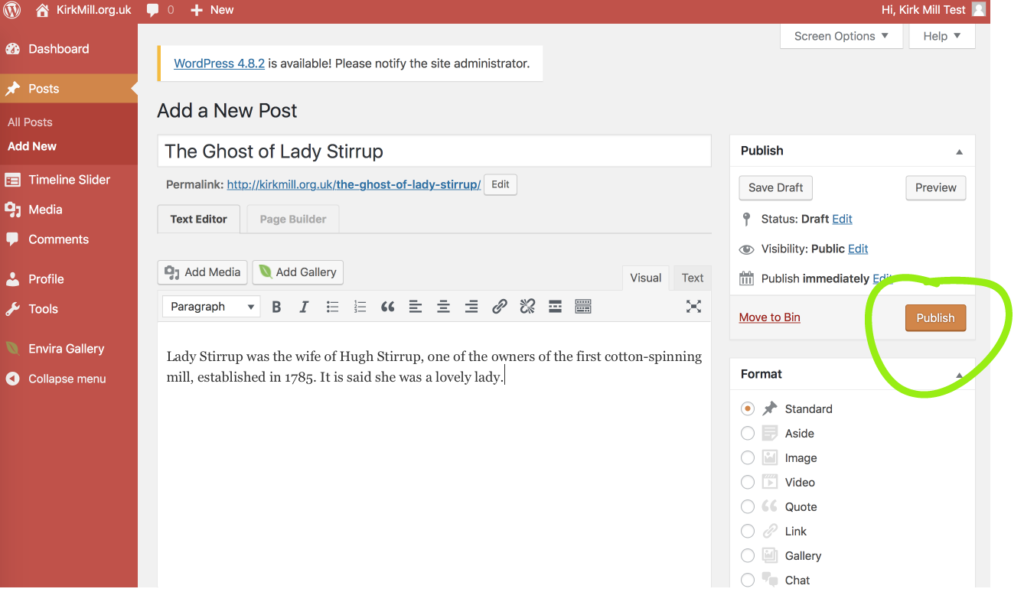
3. Now a new window will open and you have your blank canvas. The cursor will be blinking in the ‘Add a new Post‘ box. In grey text, it will invite you to ‘Add a title here‘. We’ve already added the title of our new Post: The Ghost of Lady Stirrup. (As far as we know, there was no ghost of Lady Stirrup … if anyone knows otherwise, now’s the time to create and publish this post for real!)
4. Click in the main box below the title and add the text for your post

Publishing a Post
5. When you’ve finished typing up the text, click on the publish button.
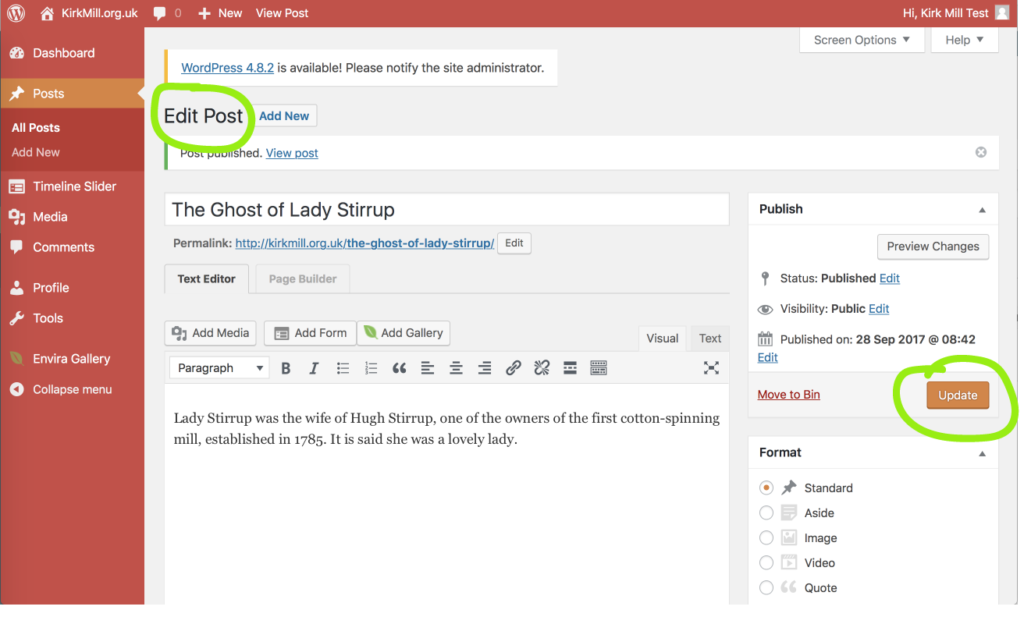
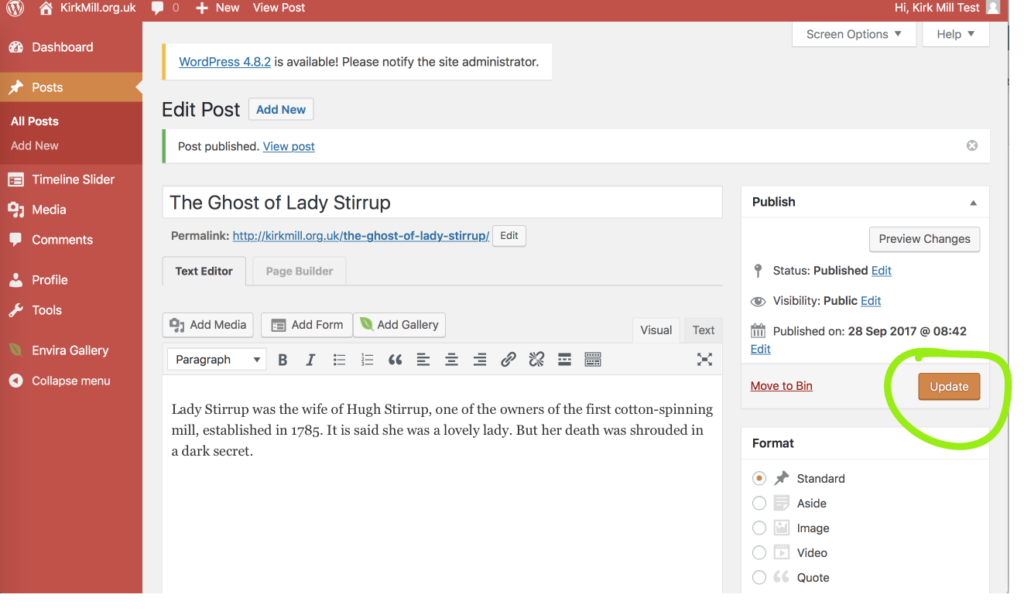
6. After a few seconds, your post will have been published and the screen refreshes. Now, where before it said ‘Add a New Post’ at the top of the window, it says ‘Edit Post‘. And where on the right, there was a ‘Publish’ button, there is now an ‘Update button‘.
Previewing a Post
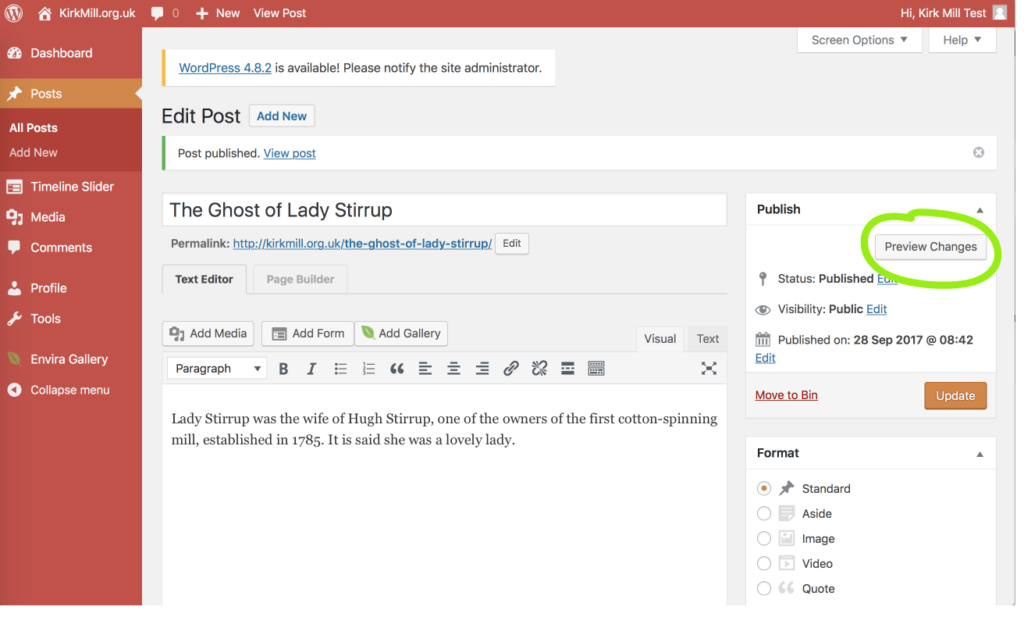
7. Brilliant!! We have a new post and it is really that easy. It’s a good idea to take a look at what you’ve done and see what you think. Previewing it is a good way to double check this is what you wanted to publish. Click on the Preview Changes button.
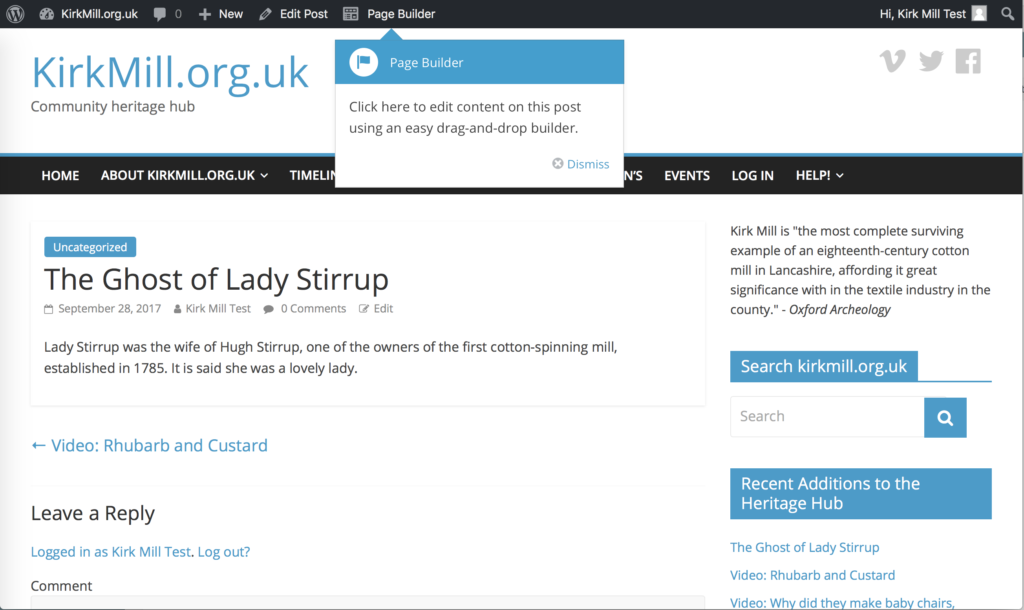
 8. Your new post will open in a new tab. This is what the public can see. If you’re happy with it, you’ve finished the job. (The box with the blue band, saying Page Builder is a pop up window. It’s not necessary to go there. If you want to have an investigate, it’s not a problem. Otherwise, click on the little cross next to the word ‘Dismiss’) Note that at the very top of your screen, there is a black band where you can see the WordPress logo far left, the name of our website, kirkmill.org.uk, the words ‘New’, ‘Edit Post’ and ‘Page Builder’ – on the far right, you can see your username and user image (if you added one). This band tells you that you’re in ‘edit’ mode. The general public can’t see this.
9. If you see a typo or want to change the text, no problem. We just do a quick edit.
Editing a Post
10. You now have two tabs open in your browser: one is where you have been creating your post and the other is the post as seen by everybody else. Here I’m using the internet browser, Safari. If you’re using a different browser, it’ll look a little different, but the text for each tab will be the same:

11. Click on the ‘Edit Post’ tab:

12. Now you’re back to your log in area and you can make changes to your post. Simply go back to the text area, make your changes and click ‘Update’
 13. Nothing much will happen. But when the page finishes refreshing, your post will have been updated. It’s worth previewing again to make sure you’re happy with what you’ve done.
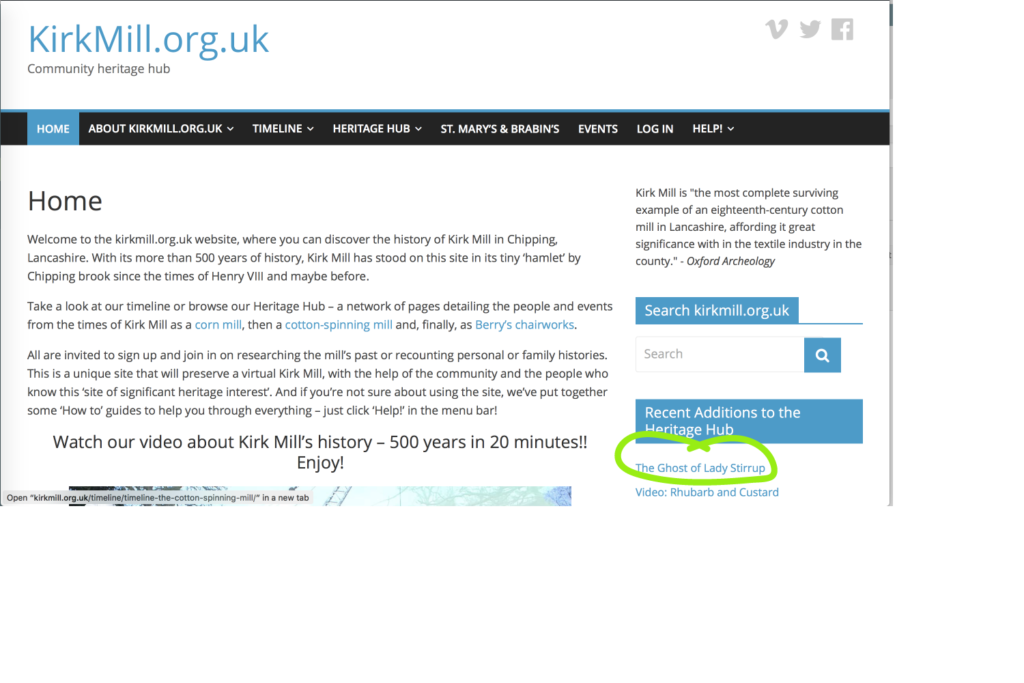
14. So that’s a Post posted. A link to your post will be available on the home page of the website. Go to www.kirkmill.org.uk and take a look.
BUT – no one will be able to find your post in any other way. That’s why it is important to add tags and categories to your post.